Overpainting
Last month I decided to paint over, or overpaint, a large Ikea artwork I had in my living room. Over painting is a technique used by many of the great artists when supplies were short and canvasses hard to come by. It is an age-old tradition and I decided to use it on this artwork.
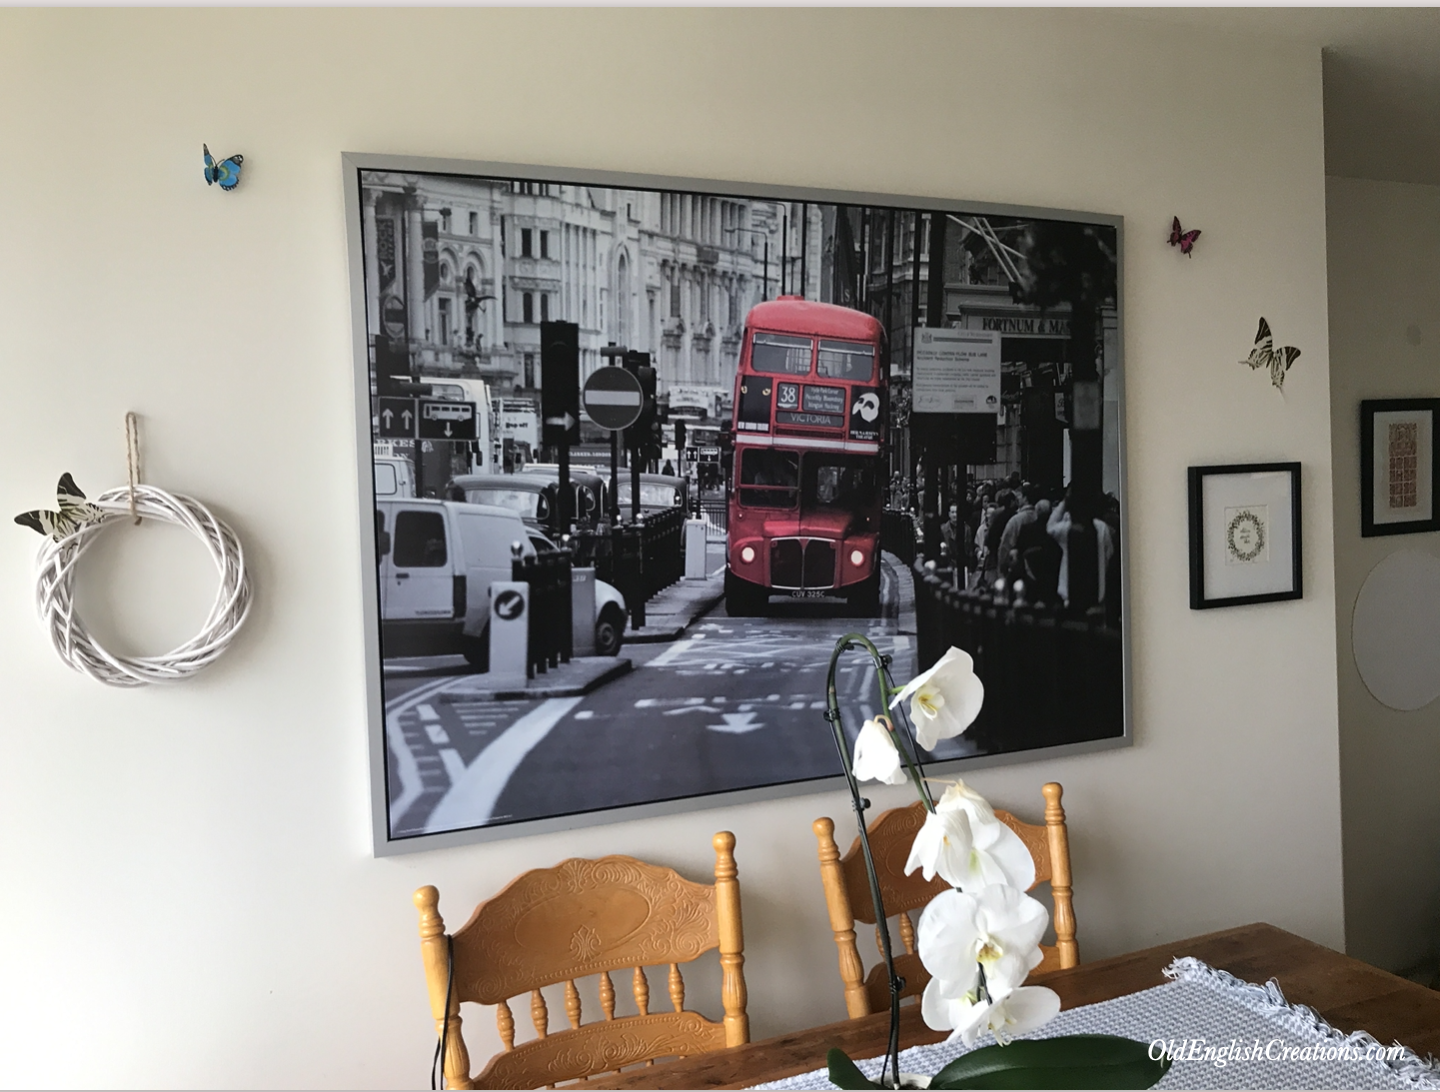
Original Image
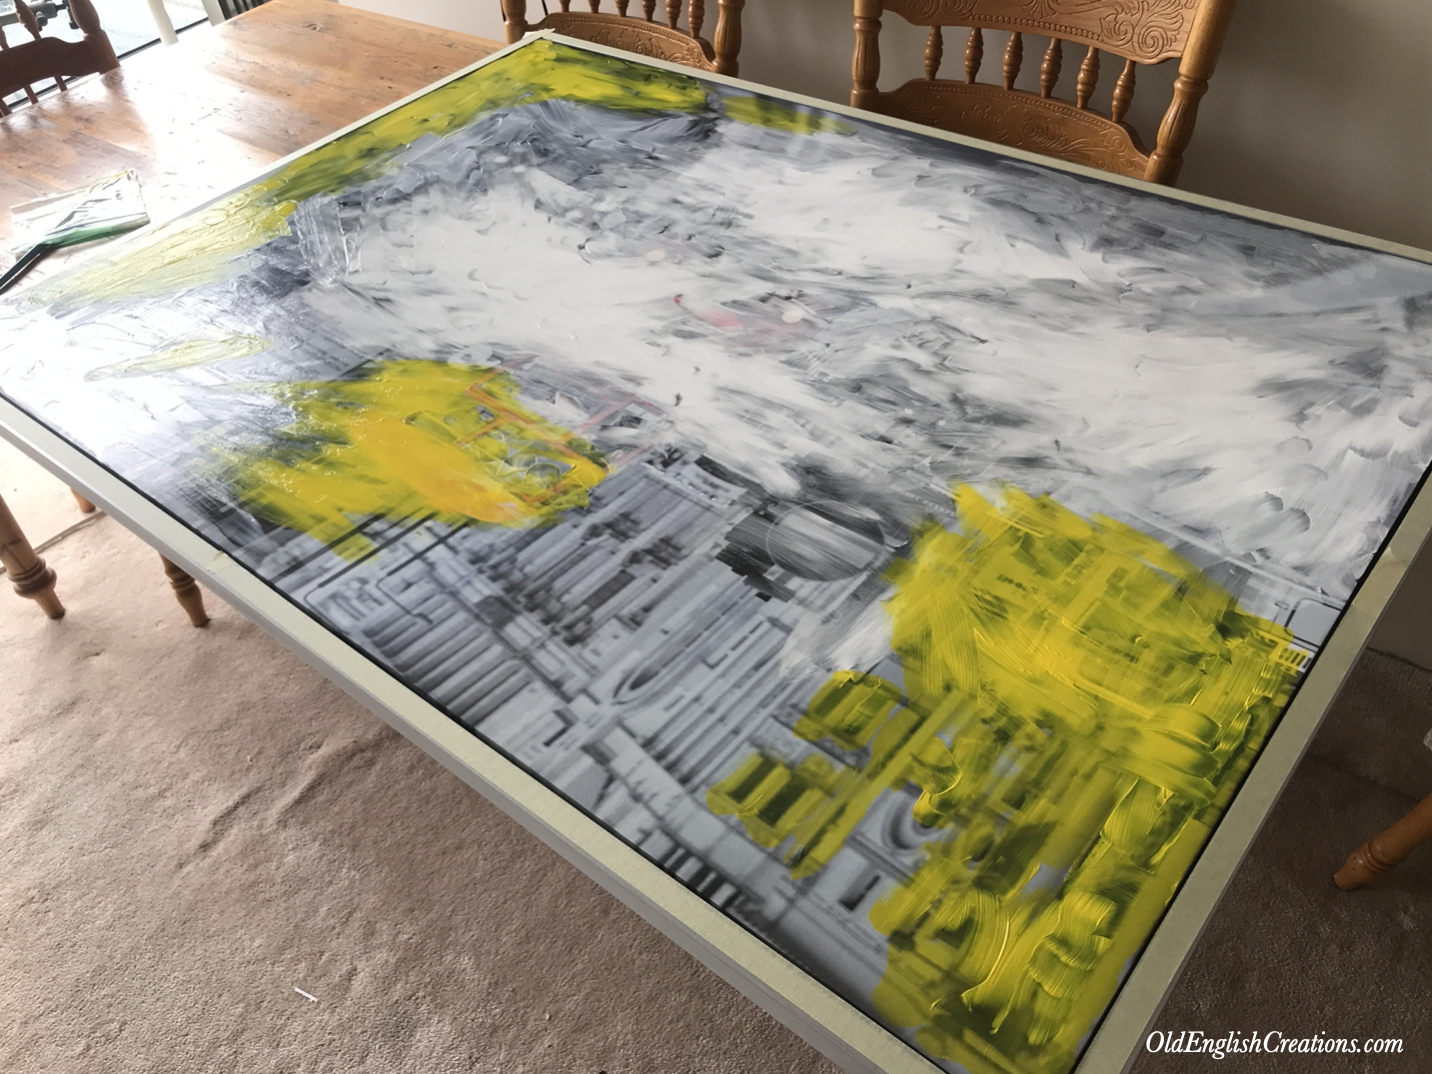
The original image was a photograph of a London bus in a bustling street. It was in black and white except the bus which was a bright red and stands as an icon for London, England. We’d had this piece for over seven years, and I had become a little tired of it, so I wanted to make a change.
Rather than giving it away I thought that as it was such a large canvas, I could do something with it art wise in my quest to be a better artist.
Read more >>> Alison’s Art Journey

Acrylic Overpainting Video
If you want you can watch the video I made for YouTube about this exact process.
Process
Creating an acrylic overpainting of an Ikea artwork, or any other artwork, can be a delightful and creative process. As a hobby artist with a liking for mindfulness, my approach to this project is that I wanted it to be both relaxing and fulfilling.
Remember, your hobby art is a sanctuary for your thoughts and creativity. Enjoy the process, be kind to yourself, and let your upbeat and creative energy flow onto the canvas.
Material Preparation
I gathered my meagre acrylic paints, brushes, palette and any other materials I might need. I made sure that my workspace was organized and free of distractions to maintain a mindful and focused environment.
I was going to do this work on my dining room table. This is a very old table made from 100year old floorboards. We originally got it so that the kids could work at it and if they made a dent or drew on the top, it didn’t matter. It is a working table and I’ve now commandeered it as my creator studio table.
Acrylic Paint
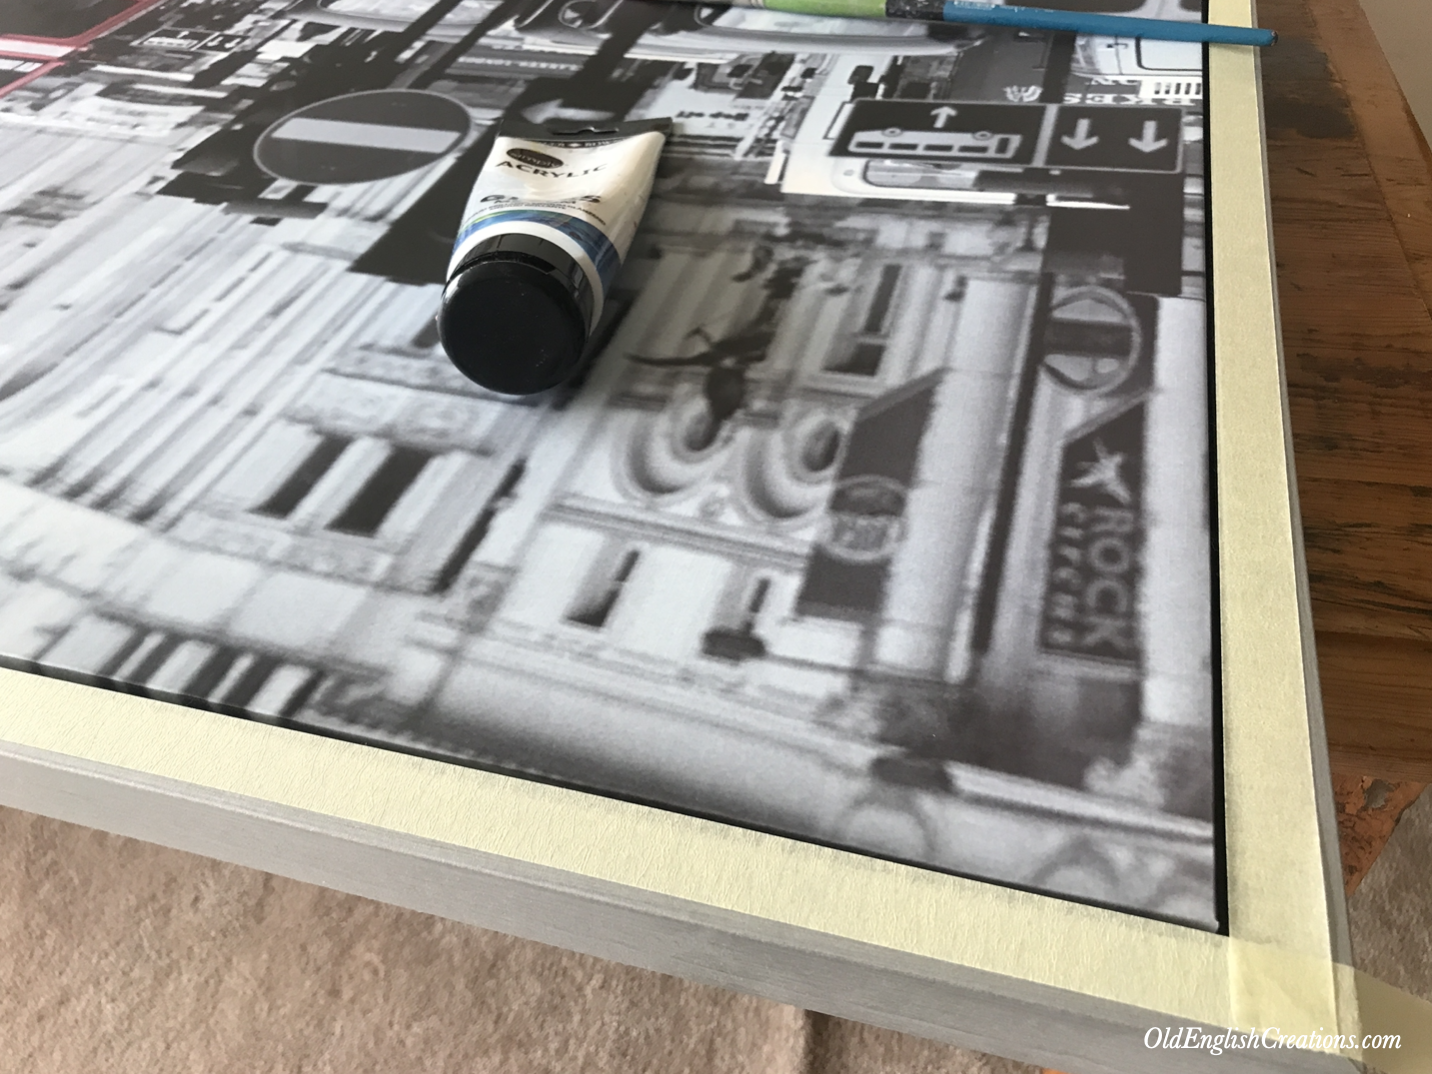
I began by trying to cover the very black and darker parts of the image. I used both white and yellow acrylic paints whcih were left over from my kid’s school art classes.
Next, I bought some dollar store white and red to continue to cover the darkness in the painting. This took several coats and I left each one to dry overnight.
Then I bought some better acrylic paints and a few colors. Additionally, I purchased a half-liter bottle of white which finally managed to cover the canvas.
Inspiration
During this process I’d been watching the YouTuber Betty Franks and watching how she was working with acrylics.
If you recall this was my fifth every acrylic painting and I was not sure what I was doing.
Betty worked he canvasses by adding colors in blobs and circles. Her palette was bright much like mine, so I thought I’d do what she was doing.
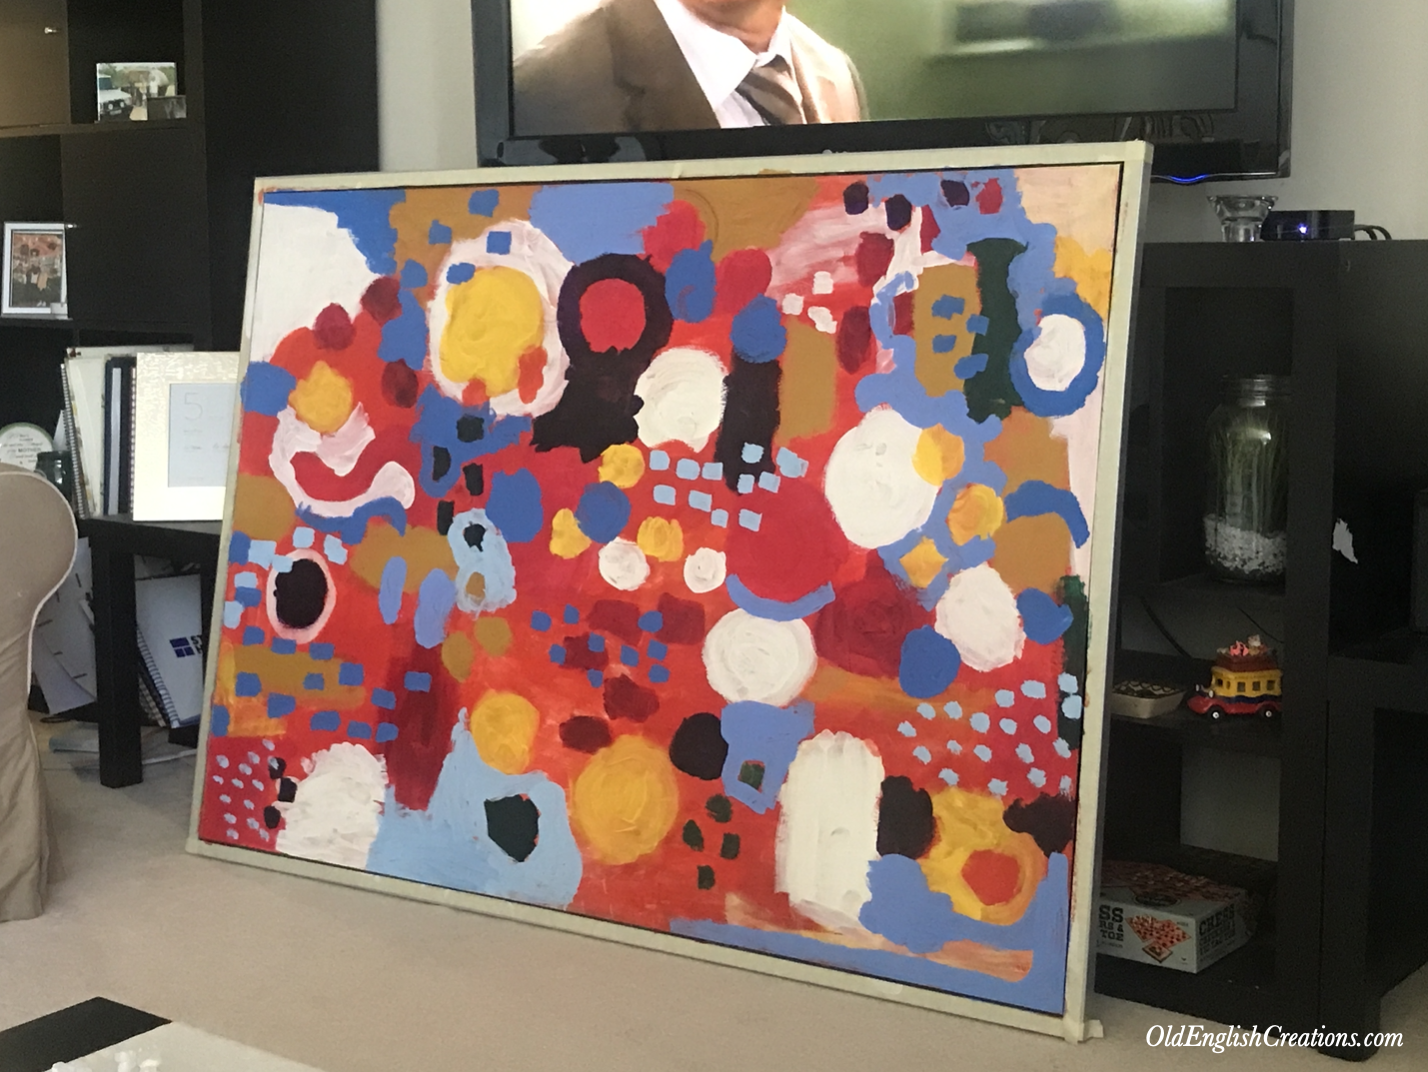
I began adding blobs of yellow, blue and green. I added ciclles and groups of bigger blobs and shapes. This I did for several days allowing the paint to dry each night.
Then I realized that because she was drawing flowers that was why she did blobs and circles. This was a revelation.
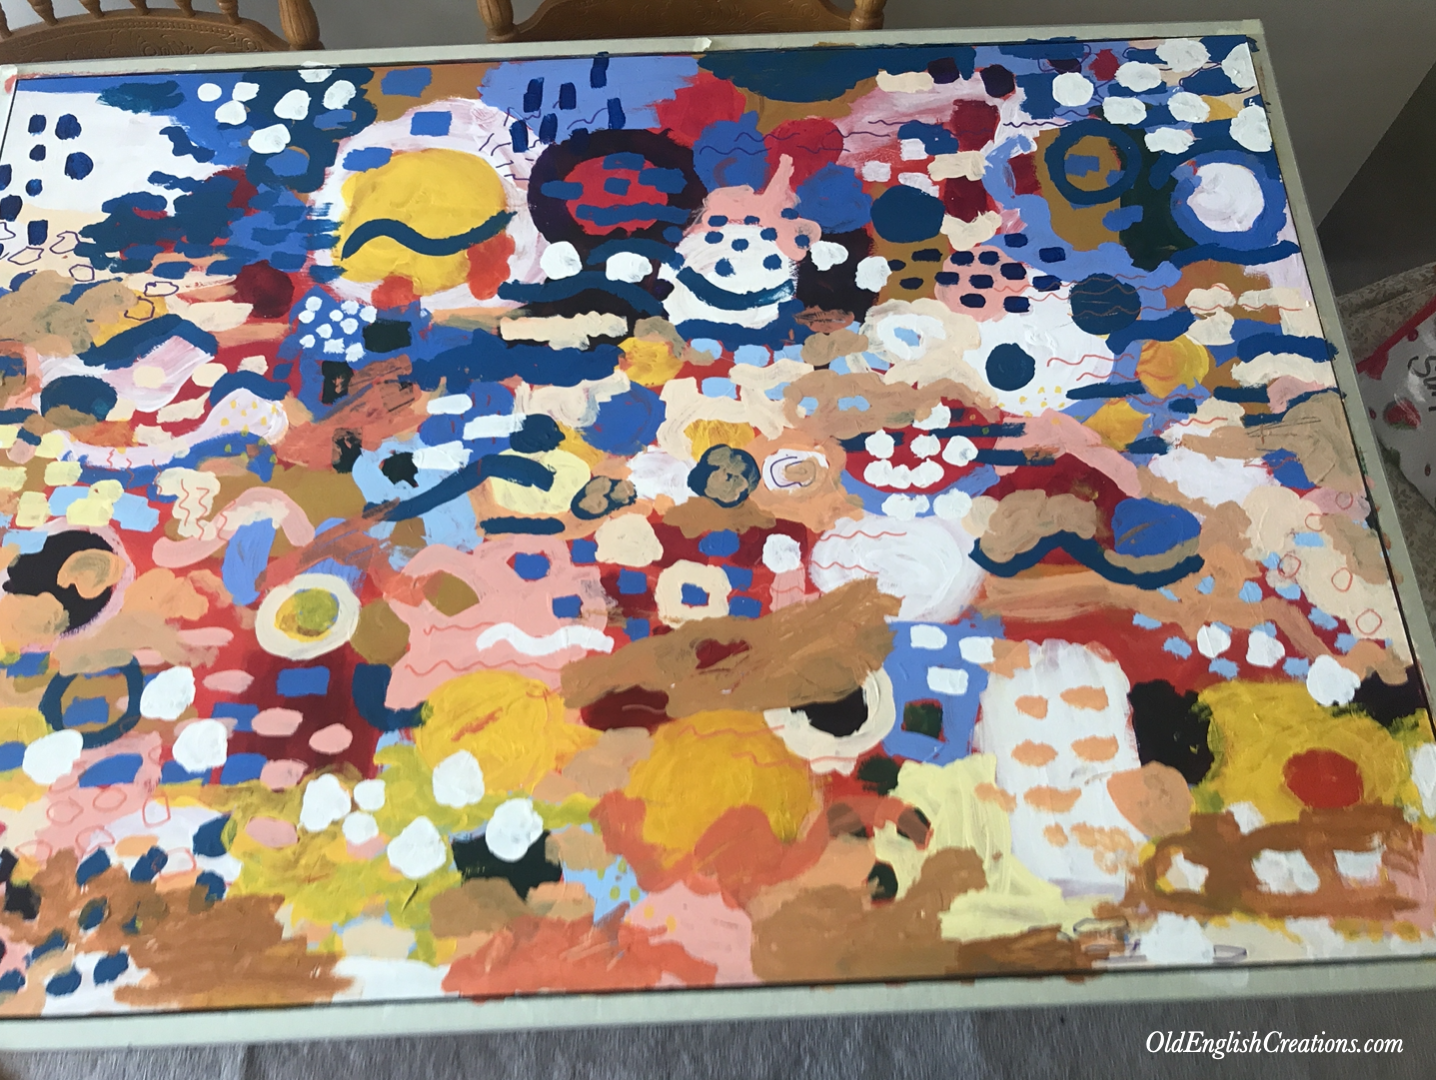
By this time, I had a highly colored very busy canvas that was almost humming.
I took the art from the table and propped it up against my wall in the living room and lived with it for a few days.
This was a very distracting piece and there was no where for the eye to rest.
Seascape
I though then that I’d like to have a seascape as that would be restful and easy on the eye. This painting hangs in a place and dominates the room. I wanted something that I could live with and that would not be intrusive.
I live at the coast and I decided to try to create the visual from English Bay which is the closest beach to me.
Read more >>> Sketching English Bay: Vancouver
Completed Layer
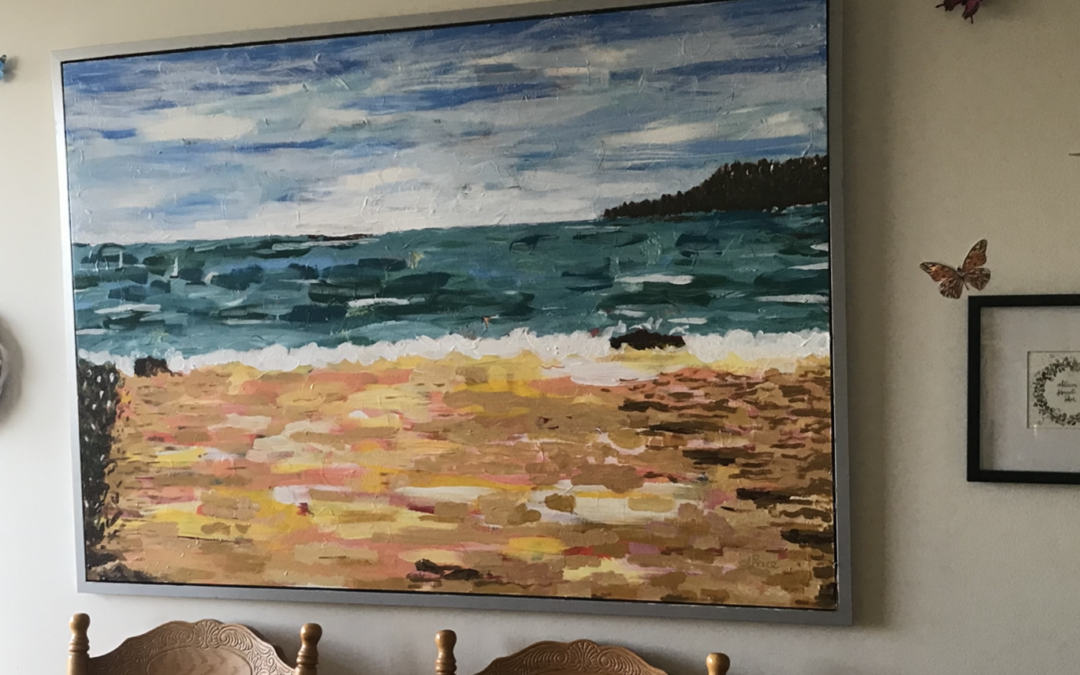
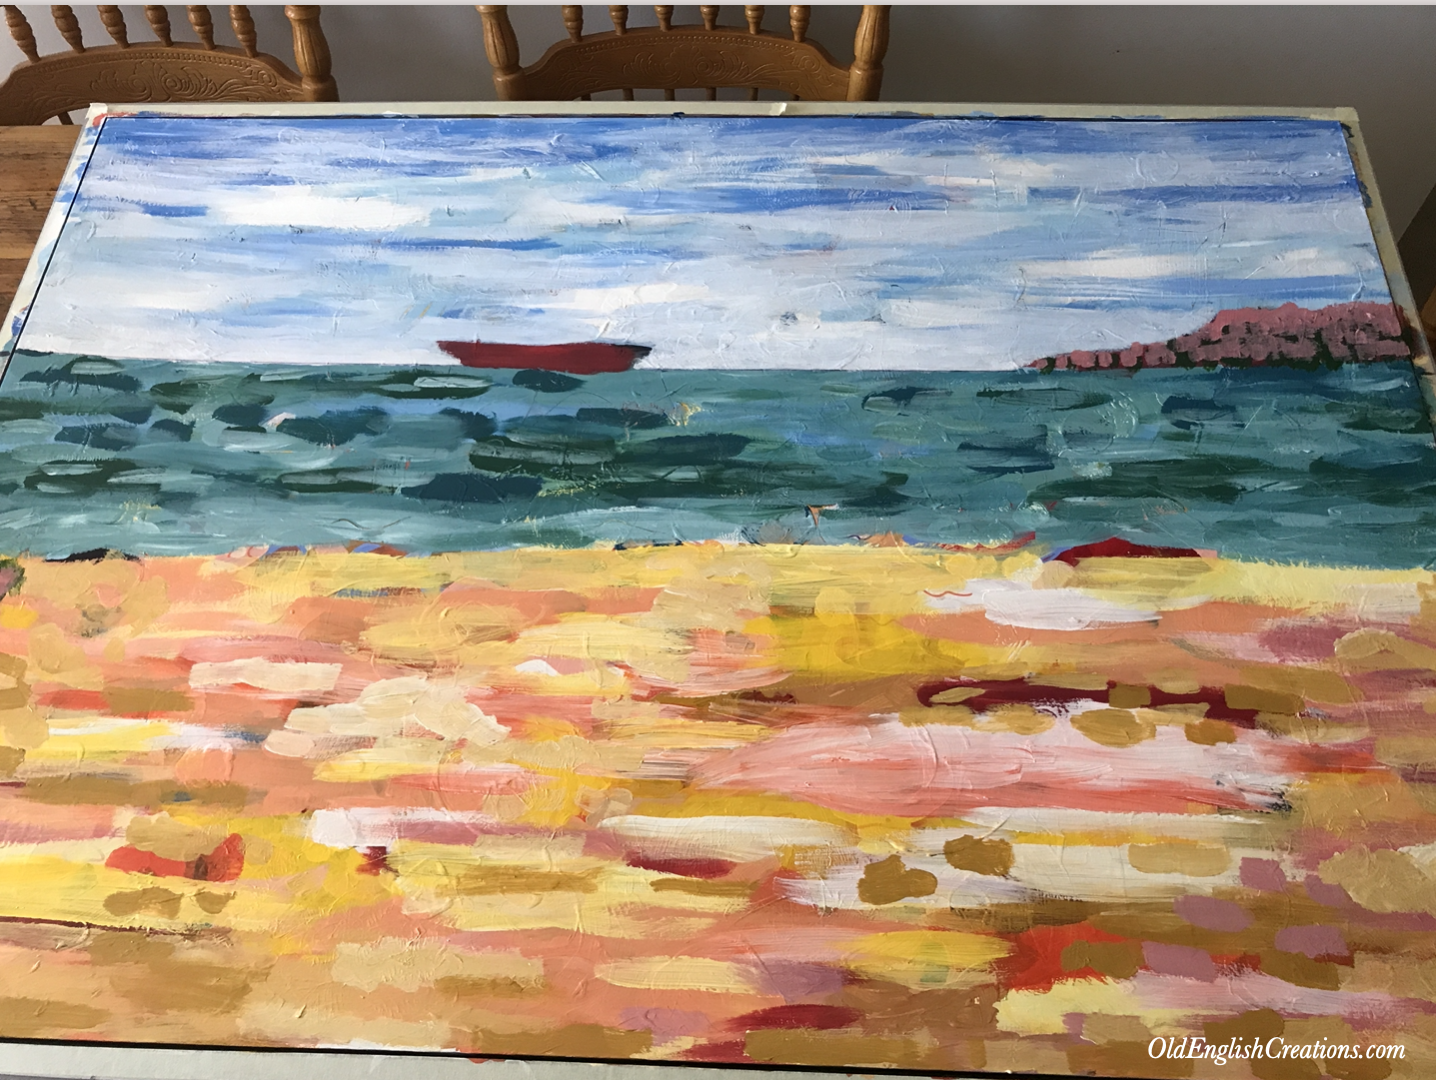
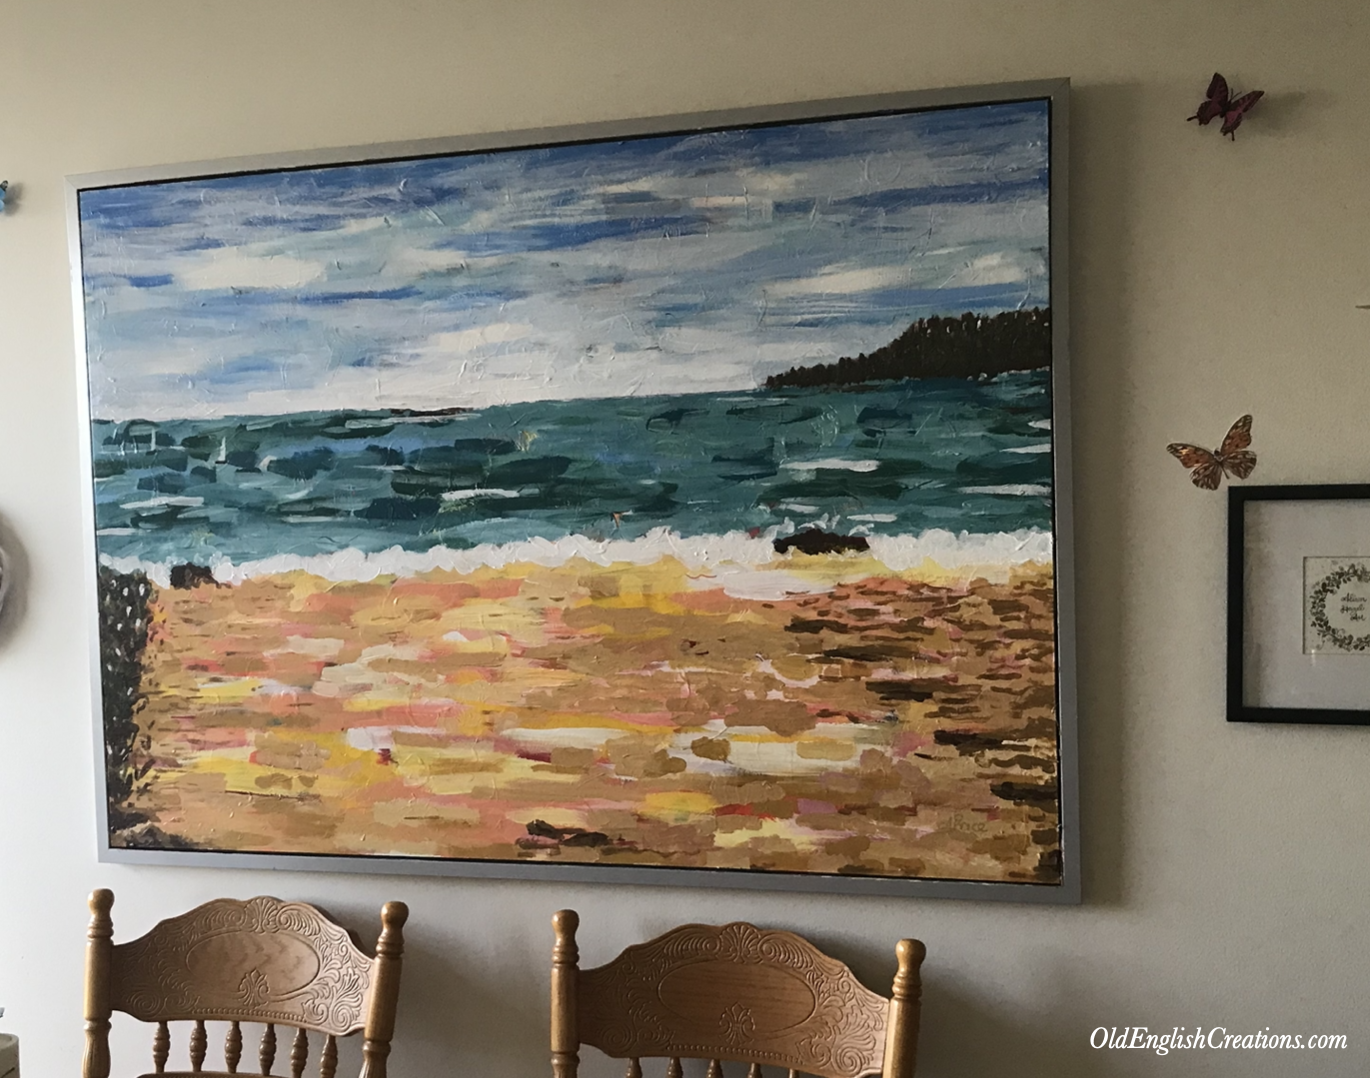
The seascape is what I did in the end. I partitioned the whole canvas into three horizontal bands thus:
Top
The top horizontal band is the sky.
Middle
The middle horizontal is the sea.
Beach
The bottom horizontal band is the beach.
I then brought in colours more related to these three areas. Whites and light blue for the skies. For the sea I tended to go for more a green/blue because really that is the colour what the water looks like.
For the beach I used a variety of colours in yellows, oranges and reds with a lot more dots and speckles to kind of represent the sand and the roughness on the beach. I finished up with some seaweed on either side, just to give a visual focus towards the center of the painting and draw the eye towards the white on the horizon.
How Long it Took
This final painting took about six days of daily paint and then let it dry overnight then painting again the next morning. But in the end, I was quite happy with what I created.
I added some finer details with Posca paint pens. I signed it in the bottom right with my gold pen that I love.
A few days later when it was dry, I removed all the masking tape and hung it back on the wall. This is an incredibly heavy painting for one person to wrangle, but I did. Phew…
Final Thoughts on Overpainting
When I started this project, I didn’t really know where it was going to end up. I just knew that I couldn’t live with the grey photograph anymore.
This painting has gone through several iterations of colours and shapes. Until finally I found my groove. In a way as I created the two smaller paintings that are almost, miniatures, if you will, of the actual big painting.
I’m beginning to think that perhaps acrylic seascapes might be my thing. This is the first painting I’ve done which is acrylic and abstract and a seascape. I’m bringing these three components together might be a way forward for me.
Previously I’ve dabbled in watercolors and coloured inks, which I still love, but I found a lot of satisfaction working with these acrylic paints. I think I’ll explore more of this medium more in the future.
Now I’ve just got to find a name for the piece. Any ideas?
Art Supplies
You can find links to the art supplies I used on this page.
Author Bio: Alison Hazel
Alison Hazel is a hobby artist and she shares her ongoing journey about becoming an artist later in life. She creates simple art that anyone can make. She hopes to inspire you to reach your creative potential in the area that suits you.
Artist Interview: Jules
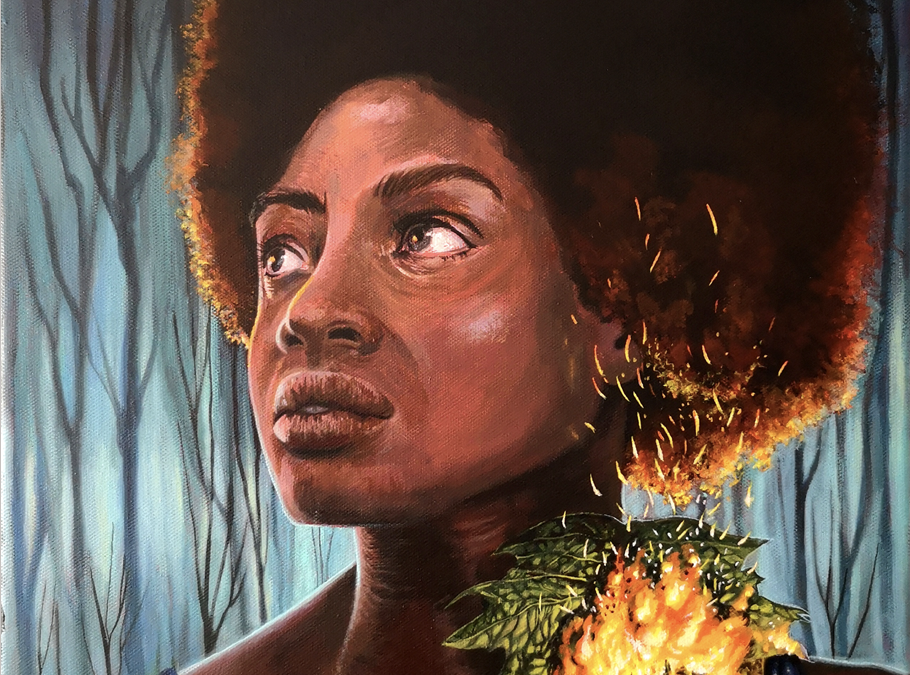
In this artist interview, meet Jules, a traditional artist based in Toronto, Canada. Her acrylic and watercolour works focus on bringing life and energy to portraits, still lifes, and media.
Art for Self-care
Read my journey on Art as Self-care. Get some tips and ideas on how you can add some journaling processes to your day.
52 Herbs Coloring Book – Self-care for Herb Lovers
Get your 52 Herbs Coloring Book – Self-care for Herb Lovers with original artwork by Alison Hazel Art available from Amazon.
